Malvern Panalytical Scientific Award 2023

Our 2023 Scientific Award is now open – and there’s a €5,000 prize for the best entry.
Entries close August 31st – you’ve still got time!

Mesothelioma Caused By Asbestos: A Complete Guide

Mesothelioma Caused By Asbestos: A Complete Guide

Asbestos was used as a cheap, multi-purpose material throughout most of the 20th Century.

Unfortunately, what people didn’t realise was that the handy mineral lurking in many of their households was actually deadly if inhaled. 

Read on for a complete guide to one of the most deadly and tragic consequences of asbestos inhalation – mesothelioma.

What is Asbestos?

Asbestos is a mineral that naturally forms into flexible fibres These fibres have been used for a variety of purposes ranging from construction and insulation, to paper and plastic. While its use steadily declined from the 1980’s after its health risks became public knowledge, the buying and selling of asbestos wasn’t officially banned in Australia until 2003. 

Risks of exposure are much lower than when asbestos was still being actively used, however, it is still a threat due to how many homes and products still contain it without their owner’s knowledge. Construction and scrap metal industry workers are particularly at risk when working with properties or materials made before the 1990’s. 

Workers who have been exposed may suffer from cancer and other lung related health conditions. Of these, mesothelioma is considered one of the most deadly. 

Learn more about the danger of asbestos. 

What is Mesothelioma?

Malignant mesothelioma is a cancer that develops in the outer tissue of internal organs in the human body. Due to its tendency for developing on vital organs, mesothelioma is very difficult to treat or remove. 

The most common organ affected is the lungs, but it also appears on organs like the heart or the stomach, and even the testicles.

Symptoms

The symptoms of mesothelioma differ depending on the type, and also the area of the body where it has formed. 

Pleural mesothelioma occurs in the lungs and causes:

  • Lumps in the skin on your chest
  • General chest pain
  • Painful coughing and shortness of breath
  • Weight loss

Peritoneal mesothelioma affects the abdomen and causes:

  • Abominable swelling
  • Abdominal pain
  • Nausea
  • Constipation
  • Weight loss

Pericardial mesothelioma affects the heart and causes:

  • Shortness of breath
  • Chest pains 
  • Irregular heartbeat or heart murmurs

Tunica vaginalis mesothelioma occurs in the testicles and causes:

  • Swelling
  • Lumps

Unfortunately, the majority of these symptoms don’t become noticeable until later stages. Symptoms can also be confused with other common ailments, and therefore treatment isn’t sought out. 

How Does Asbestos Cause Mesothelioma?

Asbestos exposure is the primary causal factor in 90% of mesothelioma cases. 

When asbestos fibres become airborne, such as during the demolition of a house containing asbestos, they can be inhaled and later turn cancerous. The inhaled fibres can become lodged in the lungs, or can enter the digestive system and become lodged in the abdominal cavity or the testicles. 

Unfortunately, the human body cannot break down asbestos fibres. This means prolonged or frequent exposure can lead to large accumulations of the deadly fibres. 

Over time, they damage the DNA of healthy cells and rampant cancer growth breaks out wherever the fibres are lodged. 

How is Mesothelioma Treated

Sadly, most cases of mesothelioma are terminal. People are usually asymptomatic during the early stages, while during the later stages symptoms are severe and progress quickly.  Only 50% of sufferers will survive a year after diagnosis, with only 10% living for a further 5 years. 

The main reason survival rates are so low is because the cancer is so difficult to remove. Instead of forming tumours that can be removed in one operation, mesothelioma grows along the tissue of multiple organs, which means it is difficult to operate on, and to target for radiation therapy. 

The most important treatment plan for mesothelioma sufferers is often palliative care, focusing on pain relief and prolonging life. 

Prevent Mesothelioma with Preventative Asbestos Testing

With such a poor outlook once mesothelioma has been diagnosed, the most important way to fight it is to prevent the asbestos exposure that causes it in the first place. 

If you work in an industry with a high asbestos exposure risk, like construction or scrap metal sorting, analysing a site before you put yourself or your team at risk is essential. 

Unfortunately, it is also time consuming. Many suspected asbestos cases are negative, and unexpectedly finding asbestos on a job can be dangerous – and halt progress.

To avoid this, you need a way to screen sites quickly and accurately before putting your team at risk.

The MicroPHAZAER AS Asbestos Analyser

The MicroPHAZAER AS is an industry leading asbestos detection tool. With its simple point-and-shoot function, and accurate results delivered in just 10 seconds, detecting asbestos safely couldn’t be simpler. 

The MicroPHAZAR AS is non-invasive, which means you can also avoid the time-consuming safety precautions required for manually taking samples.  

To screen a site, simply conduct a series of scans at different points, and if the results are negative you are clear to proceed. If the results are positive, send the sample away for lab confirmation safe in the knowledge that you didn’t accidentally expose any of your team.

If you want to protect yourself and your team from harmful conditions such as mesothelioma, get in contact today to acquire a MicroPHAZAR AS. 

For more information about, visit our website. 
Greenfield vs Brownfield Exploration

Greenfield Vs Brownfield Exploration

Mining is one of Australia’s most important industries, but have you found yourself wondering how new mine sites are found? 

There are two broad strategies for locating new prospective mining sites: greenfield vs brownfield exploration.

Read on to learn what they are, their pros and cons, and which, if either, is the better strategy. 

What Are the Greenfield and Brownfield Strategies?

Greenfield exploration, also referred to as grassroots exploration, is when new mine sites are located in unexplored or currently undeveloped areas. Ore genesis models are used to predict where mineral deposits can be found. Then, the site is surveyed properly to confirm or disprove the presence of the deposit. 

Brownfield exploration involves searching known or currently mined sites for additional deposits. Because the sites have already been surveyed, this process is usually very straightforward. 

Greenfield Vs Brownfield Exploration

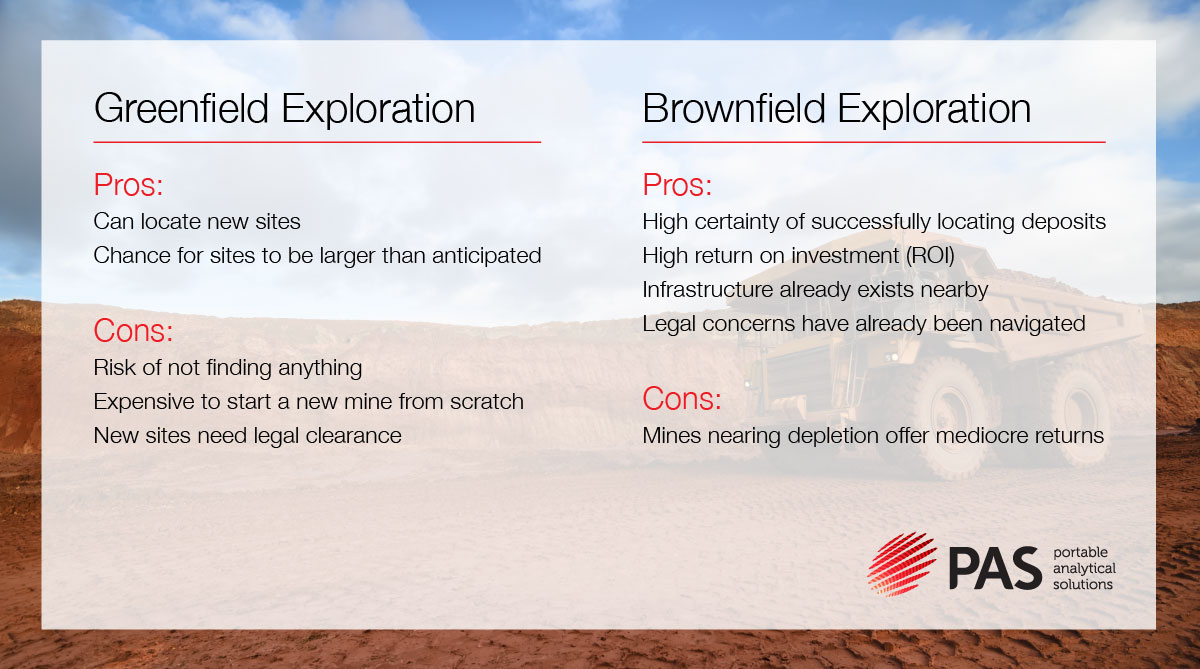
Pros of Greenfield Exploration

Ore isn’t renewable. Every mine will eventually be depleted which means new mines need to be founded to maintain a stable industry. Of the two exploration strategies, greenfield is the only one that can locate new sites, as opposed to revealing extensions of current ones.

From an investment point of view, there is also an element of surprise when greenfield exploring. Ore genesis models are predictive, which means you could survey a prospective site and find a much larger deposit than you originally anticipated. 

Cons of Greenfield Exploration

The potential rewards of greenfield exploration don’t come without downsides. Funding exploration into unsurveyed areas is a big gamble. While data may speculate that ore is there, things like the size, quality and accessibility of the deposit won’t be confirmed until the site is inspected. Not to mention, there is always the possibility that the data is wrong and there is no ore there at all.

Even if ore is found, starting a mine from scratch is very costly. The mine site itself needs to be developed, including creating road access and landscaping. Adding to the costs, all of the mining equipment for the entire operation must be transported to the site. This process takes a considerable amount of time. It isn’t unusual for a new site to take a decade before returning on the original investment. 

Legally, a brand new mine location may be disputed on environmental or cultural grounds, and other interested parties may even attempt to challenge the claim. These may stall, or even permanently prevent, a mine from being founded. 

Pros of Brownfield Exploration

The greatest benefit of brownfield exploration is the high certainty that the endeavour will be profitable with a fast return on investment. Rather than using speculation, data from the existing mine will already show nearby areas where new deposits or entry points could be formed.

A mine started with the brownfield method can take advantage of the infrastructure that has already been established to support the existing mine. Roads, equipment, even personnel, are already present and just need to be extended to the new site. 

Brownfield exploration also mitigates the risk of legal concerns. If the site of the original mine has already been cleared for approval, it is unlikely that a new site within the same area would unearth unforeseen issues. 

All of these positives combine to make brownfield exploration a fast and effective way to source and maintain revenue. 

Cons of Brownfield Exploration

Brownfield exploration is a brilliant short term way to generate safe revenue, but if a mine is nearing depletion, greenfield strategies need to be employed. It’s important to recognise when a site has reached its potential and look further afield. 

Which is Better?

Unfortunately, the answer isn’t as simple as just choosing one or the other. Both are essential to a healthy mining industry. 

If you think of mines as having a life cycle, in the early to mid-life phase, brownfield exploration is preferable because it is the fastest and most cost effective way to access more ore. 

In the long term, however, as the mine’s output slows, it is essential that greenfield exploration is occurring to find new, prospective sites. Given the extended time it takes to find, establish and develop a new mine, greenfield exploration needs to occur in advance of the brownfield-sourced mines becoming depleted. 

It’s also important for Australia’s greenfield industry to stay consistent because it is a big indicator of the viability of mining as an investment for foreign parties. Low greenfield expedition rates can suggest that Australia’s mining efforts are being slowed by legislation, red-tape, and strict environmental laws. 

The Niton XL2 Plus Analyser

If you are involved in greenfield exploration, one way you can make the process more viable is through quick and easy analysis. Portable Analytics Solutions distribute the The Niton XL2 Plus Analyser, a handheld tool for identifying metal alloys and mineral ores in the field. 

Using X-Ray fluorescence (XRF) technology, the Niton XL2 Plus is capable of getting immediate, accurate readings without needing to damage or remove a sample. 

Designed for the field, it’s sealed against moisture and dust, ergonomically designed, and is password and key protected for security.

If you are ready to revolutionise the effectiveness and efficiency of your greenfield exploration processes, contact us today.
For more information on the Niton XL2 Plus Analyser and its array of incredible features, visit our website.

No More Mr Fluffy: How to Identify Loose Fill Asbestos Insulation

No More Mr Fluffy: How to Identify Loose Fill Asbestos Insulation

While Mr Fluffy sounds like the name of a lovable pet, or a kid’s teddy bear, the truth isn’t something to be happy about.

Read on to find out about the dangerous nature of Mr Fluffy and loose fill asbestos insulation. 

What is Mr Fluffy?

Mr Fluffy was a form of insulation used widely in Canberra and parts of NSW in the 1960’s and 1970’s. This ‘wonder’ product was cheap and effective – and too good to be true.

Its main advantages were that it was light-weight, easy to install, and could be ‘blown’ into cavities where it would settle and create a thermal barrier. This method was called loose filling, and could be used to insulate difficult-to-reach areas. 

As a loose fill product, Mr Fluffy was made of raw asbestos fibres that weren’t bonded together. This allowed them to separate and then settle into small areas, hence the ‘settling’ effect. Unfortunately, this settling effect is the main reason that loose fill insulation is so dangerous.

Asbestos becomes harmful when inhaled. As the loose fill asbestos fibres settle they can fall through the roof cavity into the living space. Also, even if extracted, it is almost impossible to be certain that all fibres have been completely removed from a home. 

When was it Banned?

Eventually the health risks of asbestos were publicly recognised and companies were banned from installing  Mr Fluffy in the late 1970’s. Unfortunately, by then many people had been unwittingly living in contaminated homes for years.

In the 1990’s the Australian government removed Mr Fluffy from a large number of homes. Many families continued to live in homes which had undergone this removal process. 

The problem is, in 2014 studies found that even homes that had been ‘cleaned’ were still dangerously contaminated. While the bulk of the fibres had been removed, the ones that had settled into crevices still posed a serious threat. 

How Many Homes Still Contain Loose Fill Asbestos Insulation?

It is now mandatory for Mr Fluffy homes to be listed on a register. The problem is that it’s hard to know how many there are. Over 1000 homes are known to have been contaminated, with 45 remaining on the register, and the rest being demolished. 

Further complicating things, Mr Fluffy was sold directly to customers in sacks for DIY installations, and other partner companies also used it, so records of these homes are particularly incomplete. 

It’s also important to mention the existence of the Loose Fill Asbestos Voluntary Purchase and Demolition Program, which involves the government purchasing and demolishing loose filled asbestos insulation homes. If you are demolishing or renovating a home and find this form of asbestos, you may need to stop so that the owner can assess their options. 

How Can You Identify Loose Fill Asbestos Insulation?

For anyone in the construction industry, when renovating or demolishing a house from the 1960’s and 1970’s it is important to have a reliable screening method. This protects the health and safety of your team, and also prevents unexpected asbestos finds from halting work for longer than necessary. 

There are two ways to screen: invasive laboratory testing or with a Near Infra-Red Spectroscopy (NIR) tool. 

Invasive Lab Testing

Invasive lab testing involves securing a sample of the suspected asbestos material and sending it away for laboratory testing. Because loose fill asbestos fibres are friable, meaning they are easily disturbed and made airborne, testing safely is a slow and detailed process. 

The tester must wear complete protective gear, as well as covering any indoor surface where fibres made airborne by the disturbance could settle. They also need to wet the sample before collecting it to limit friable fibres being dislodged. The sample must then be sealed and the tester needs to thoroughly clean themselves. 

This process must be completed by a professional. Wait times from the initial call, to getting the results, will take days. 

If the test confirms the presence of asbestos, it will have been worth the wait. But if it produces a negative result, you will feel frustrated that you lost days of productivity for what was ultimately just a precaution. 

microPHAZIR AS Asbestos Analyser

MicroPhazir AS
MicroPHAZIR AS Asbestos Analyser

The microPHAZIR AS solves this problem. Don’t halt your project for days unnecessarily. The microPHAZIR AS is a non-invasive tool that can screen for asbestos in just 10 seconds. Save hours spent on the sample taking process and get a result immediately. 

The vast majority of homes don’t contain loose fill asbestos insulation. With the microPHAZIR AS you can keep your projects moving, and your team and workplace safe. If the test comes up clear you can resume work, and if it does identify asbestos, the ‘point-and-shoot’ function means your team can limit their health risk by taking a limited amount of physical samples for the laboratory to verify. 

Learn more about the MicroPHAZIR AS.

Asbestos In Popcorn Ceiling? Fact Or Myth

Asbestos In Popcorn Ceiling? Fact Or Myth

‘Popcorn ceilings’ are a common feature in homes built between the 1950’s and the 1980’s. In the years since, they’ve gained a reputation for containing asbestos. 

If you work in the construction industry and are regularly encountering popcorn ceilings, you may be wondering if these rumours are true. 

What is Popcorn Ceiling?

Popcorn ceilings get their name from their resemblance to the popcorn that you would buy from a movie theatre. The popcorn appearance is due to a spray, often made from vermiculite, that would be used as a finishing texture on ceilings. 

It was popular with builders because it could mask imperfections, while homeowners appreciated its sound-proofing and fire-resistant qualities. 

Unfortunately, vermiculite often contained asbestos, which meant that people were unknowingly introducing asbestos to their homes. 

What is Asbestos?

Asbestos is a natural mineral that was commonly used in construction in Australia from the 1940’s until the late 1980’s. It was eventually banned once the severe health effects from inhaling fibres were discovered. 

Read about the dangers of asbestos here.

A common misconception about asbestos is that just by standing near it you are in danger. What this doesn’t account for is the need to actually inhale fibres. Undisturbed asbestos is safe. In fact, the cheapest way to deal with undamaged asbestos is to simply leave it alone. 

The problem with popcorn ceilings is that due to their uneven surface and tendency to ‘crumble’, they are more likely to be accidentally disturbed than other applications of asbestos. 

Do All Popcorn Ceilings Contain Asbestos?

In 1978, new popcorn ceiling materials were legally required to be made with paper fibre, but manufacturers were still allowed to sell their remaining stock. This means asbestos could still be present in popcorn ceilings installed in the 1980’s. 

So, does this mean that the rumours are true and all popcorn ceilings contain asbestos?

Not necessarily. 

If a popcorn ceiling was installed between 1950 and 1980, the chances are fairly high. Post-1980, while it is still possible that a building contains some of the left-over asbestos stock, it is unlikely. 

Fear about asbestos became rampant once the harmful effects were discovered, and given manufacturers and installers were the most likely to be affected by it, its use dropped off very quickly. 

The type of material also dictates the chances of asbestos being present. Vermiculite was usually made up of between 1-10% asbestos fibres. Even at 1%, the threat of asbestos needs to be taken seriously. 

Alternative materials like styrofoam and cardboard were less common, but are also much less likely to contain asbestos.  

So while not all popcorn ceilings contain asbestos, the chance is high, and it is worth testing to be sure. 

How to Find Out if a Ceiling Contains Asbestos?

The most common way to test for asbestos is to scrape away a sample of the popcorn ceiling and send it to the lab. While professionals can do this safely, there is always an inherent risk associated with invasive asbestos testing. 

Any damage to the surface can create harmful dust particles. Protective gear must be worn, and the dust must be collected after the sample is taken. If the test takes place over a carpeted area, a plastic sheet should be laid down to prevent particles from being caught in the carpet. 

To get an accurate assessment, samples should be taken from multiple points in the popcorn ceiling, meaning this cumbersome process needs to be repeated multiple times. 

Finally, the sample must be sent, analysed, and the results forwarded back before work can proceed. 

While necessary, the time it takes to complete a test and wait for the results can seriously delay a project.

microPHAZIR AS Asbestos Analyser

MicroPhazir AS
MicroPHAZIR AS Asbestos Analyser

If you are in the construction industry and are regularly having work grind to a halt because of asbestos, you need the microPHAZIR AS. 

Right now the two things slowing you down are time-consuming safety measures and lab turnaround times . The microPHAZIR AS solves both.

The microPHAZIR AS is a non-invasive screening tool. Using Near Infra-Red Spectroscopy (NIR) technology, it can identify the six main types of asbestos in just 10 seconds without having to remove a sample. 

With its ‘point-and-shoot’ function, simply aim at the popcorn ceiling and receive an accurate reading. In mere minutes, you can analyse multiple points of a ceiling safely, accurately and then choose which sample area to send to the laboratory for verification. The microPHAZIR AS is the superior tool for keeping your projects moving, and your team and workplace  safe. 

For more information, check out the MicroPHAZIR AS. 

Hyperspectral Imaging In The Food Industry

Hyperspectral Imaging In The Food Industry

While quality control is a major consideration for every production business, it is a particular concern in the food industry. Here, even slight changes in colour and chemical make-up can have a major impact on quality and, most importantly, saleability. There is also a significant risk of contamination which, if undetected, can have incredibly serious consequences.

As such, food quality inspection is a critical part of processing activities, helping identify impurities and removing any foreign objects. However, this has traditionally been quite a labour intensive activity, requiring multiple operators to manually monitor the produce. It has also been somewhat limited, as the human eye can only spot so much, particularly on a fast-moving conveyor belt.

However, hyperspectral imaging is revolutionising how we approach food quality inspection. In this article, we take a look at what this technology is and how it works. We will also explore the benefits it can provide and how it is being used within the food industry. 

What is hyperspectral imaging?

Put simply, hyperspectral imaging is a way of discovering more detail than is visible to the naked eye. Basic imaging technology (like a digital camera) mimics the eye by recording light in the Red, Green, and Blue (RGB) spectrum. But hyperspectral imaging takes this several steps further, capturing light in many different spectra, covering a wide range of wavelengths.

As a result, the picture recorded by hyperspectral imaging technology reveals much more about the product being scanned. This includes the subtle variations in colour, size, and shape that often indicate bruising, blemishes, or other impurities. It also includes the product’s chemical make-up, like its water and sugar content, protein and fat content, and pH level. 

Inspecting food quality with hyperspectral imaging

When set up correctly, machine vision is far better at spotting inconsistencies than even the most highly trained eye. Hyperspectral imaging can also detect quality issues that would normally require a sample to be tested in a lab. These tests usually destroy the produce and can take hours, if not days, to carry out. 

This means that hyperspectral imaging can make monitoring food quality much quicker, easier, and more accurate. The technology can also be designed to suit a variety of uses and tailored to fit different operational set ups. And, while hyperspectral imaging equipment was previously very expensive, recent advances have made it a lot more affordable and accessible.

What foods can hyperspectral imaging be used on? 

While almost any food can be inspected using hyperspectral imaging technology, it is better suited for use on certain produce. For example, it is quite effective at analysing the ripeness and water content of fruits like apples and most berries. It can also detect the dry matter content of avocados in real-time, without damaging the skin.

Hyperspectral imaging can also be used to inspect the quality of meat products. For example, it can measure the pH of beef (which affects colour) and even predict how tender it will be. It can also be used to monitor the levels of harmful bacteria, like E. coli and salmonella, in chicken.

However, some systems will be less suited to analysing small grains, like rice and certain cereals. This is usually because the camera resolution is too low to identify individual grains, particularly on a fast moving conveyor belt. 

Examples of how hyperspectral imaging is currently being used for food quality inspection

While the technology itself is not particularly new, hyperspectral imaging is a relatively new approach for food quality inspection. As such, its use is becoming more widespread and there are new and creative applications being trialled all the time. However, at least for now, this technology is being used for two main purposes.

Detailed analysis of food quality

More than simply assessing how produce looks, hyperspectral imaging can actually analyse its quality. This means checking everything from water and sugar content, or protein and fat content, to identifying mould and other contaminants. It also means identifying which pieces of produce are ripe and ready to sell, and which may need more time.

As such, this technology can help sort large volumes of produce by quality or grade. It can also support decision making about how certain produce is best used to increase marketability and maximise profitability.

Detecting contaminants and foreign objects

The speed and accuracy of hyperspectral imaging also make it great at spotting anything that does not belong. This could be bits of foreign material (plastic, metal, glass, etc.) that have made their way onto the production line. Or, it could be remnants of other produce left on the line from previous runs.

Being able to identify and remove these unwanted extras helps maintain the quality of the produce. It also helps minimise the risk of harmful materials making it all the way to the consumer. To assist with this, some facilities are integrating their hyperspectral imaging system with robotic sorting arms or jet blast nozzles.

Benefits of hyperspectral imaging for the food industry

There are several reasons an increasing number of food producers are choosing to invest in hyperspectral imaging technology. Here are the three top advantages such a system can provide.

It enables non-invasive, real-time food quality inspection

The biggest benefit of hyperspectral imaging is that it allows you to see things that are invisible to the naked eye. Best of all, it does this without needing to cut produce open or damage it in any way. And, it can all be done on the production line, with produce scanned as it travels along a conveyor belt.

It is more accurate and efficient than traditional food quality inspection methods

When produce is manually inspected, the definition of “quality” is open to interpretation and there is the potential for human error. But when you use hyperspectral imaging, quality parameters are set and consistently enforced by the technology. And, if it is maintained correctly, the system will require little-to-no downtime, which can help increase throughput.

It can help reduce wastage and lost profit

As hyperspectral imaging can measure quality without damaging the produce, there is no need to sacrifice samples for testing. Also, being able to accurately assess quality makes it easier to decide how produce is best processed. This, in turn, increases the consistency of the product provided to consumers and reduces the risk of in-store wastage.

Want more information?

Hyperspectral imaging machine
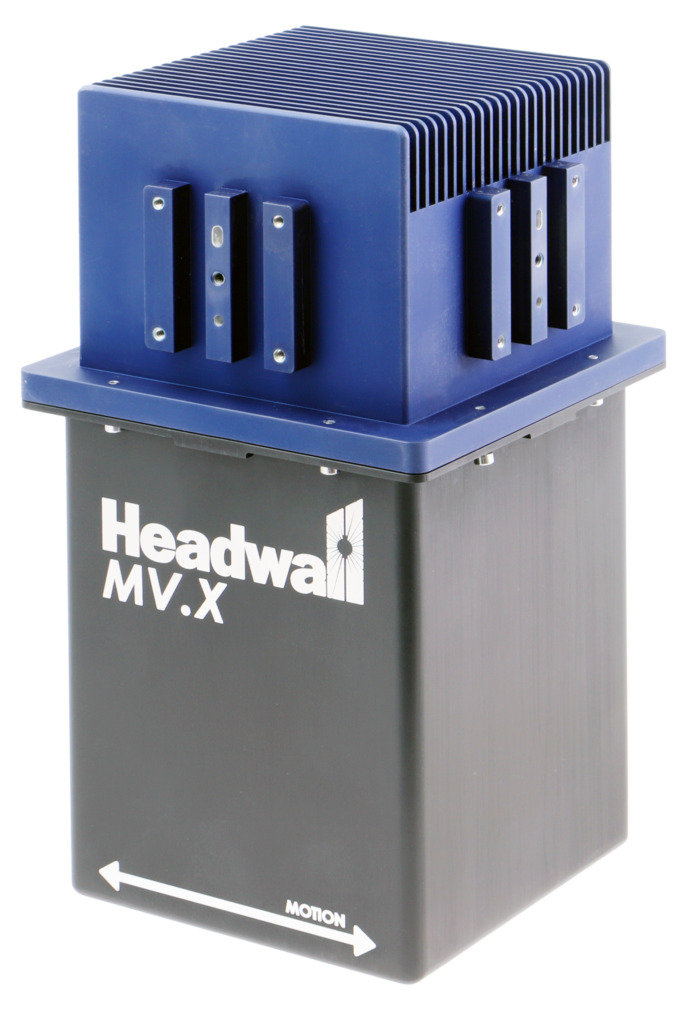
The Hyperspec MV.X

The Hyperspec MV.X is an industry leading hyperspectral imaging system. It combines a high-performance spectrometer with powerful embedded computing to give you actionable results in real-time. With this tool, you can harness the hyperspectral imaging technology that is revolutionising the food industry.

For more information on hyperspectral imaging technology and how it is being used in the food industry, contact us today.

Laser-Induced Breakdown Spectroscopy (LIBS): Everything You Need to Know about the New Player on the Field

Laser-Induced Breakdown Spectroscopy (LIBS) is an elemental analytical technique that can identify carbon in steel. While LIBS is not new to analysis labs, its growing presence in fieldwork is drawing attention. 

If inaccurate or inefficient carbon identification is hampering your business, LIBS might just be the solution.

What Is LIBS?

LIBS sets itself apart from other technologies by being far more accurate, and with the emergence of handheld devices, far more efficient. Other methods involve cumbersome devices, high levels of interference from contaminants, or certain conditions to be met before testing.

Another benefit of LIBS is its safety and limited impact on the material it is inspecting. Despite the laser heating the surface to over 10,000℃, the material remains cool for the operator to hold. It also heats at an atomic level, meaning that the material itself is barely compromised during the analysis process.

Laser-Induced Breakdown Spectroscopy Technology Explained

To use a LIBS device, the operator only needs to understand the data at the end of the process. The actual analysis is all performed by the device. While the user experience is simple, the analysis  process itself is actually quite complicated, and unique to the LIBS method. There are several steps that are worth understanding to fully appreciate the technology. 

  1. The device is pointed at the material, and a laser pulse is generated
  2. A very small portion of the surface is vaporised and becomes a plasma, made up of atoms and ions
  3. As these particles attempt to revert to their previous form, they emit wavelengths of light that act as signatures of the elements that emitted them
  4. This light hits a diffraction grating where it is broken into separate components and colours to be classified
  5. Once segmented, the wavelengths pass through a detector and their spectral data is collected
  6. The internal computer reviews the spectral data and creates a composition report for examination
  7. The data gathered is stored locally on the device and can be downloaded externally

This entire process takes place in seconds and the results are detailed and accurate. 

Applications Of LIBS

The manufacturing industry as a whole relies on knowing the composition and quality of the materials that pass through it. There are several applications in the industry that perfectly suit Laser-Induced Breakdown Spectroscopy. 

Positive Material Identification (PMI)

PMI refers to the process of quickly and accurately checking materials to either classify their compositions, or check that their compositions are correct. This is an essential aspect of manufacturing because of the risks associated with incorrectly classified materials.

Alloys in particular are used for different purposes depending on their strength, malleability and melting points. If they are classified as having different elemental components to what they actually contain, they could fail and cause loss of production, incur replacement or repair costs, and even endanger surrounding workers. 

Another crucial aspect of PMI is ease of use and speed of analysis. The ‘point and shoot’ function of handheld LIBS devices makes it easy to move from one material to the next. Also, by having the computer store the data for the user, they are not required to record their findings between samples. This saves them further time. 

Non-destructive testing (NDT) is another important consideration. The materials are a commodity, and if part of that commodity is destroyed when tested, that equates to a loss of income. LIBS heats such a small surface that the naked eye can barely detect where the analysis has taken place, so the sample does not lose any value.

LIBS is truly transforming the possibilities of PMI in the field.

Petrochemical

The petroleum refinement process creates low concentrations of elements that are treated as valuable bi-products. The chemicals that most often appear as bi-products include nickel and copper, which are light elements. As the leading detector of light elements, Laser-Induced Breakdown Spectroscopy is perfectly suited for petrochemical identification. 

Scrap Metal Sorting

Scrap materials are inherently more difficult to categorise because when they are collected, their origin may be unknown and they are often contaminated. LIBS devices mitigate safety concerns around handling contaminated materials because the operator does not have to interact with the sample, other than pressing the device against it.

Contaminants are easily identified with LIBS devices because of their ability to segment wavelengths and categorise each element individually. Scrap is a competitive industry. Finding out which materials can actually generate a profit needs to be a fast process for analysts to remain competitive. 

Handheld LIBS Analyser

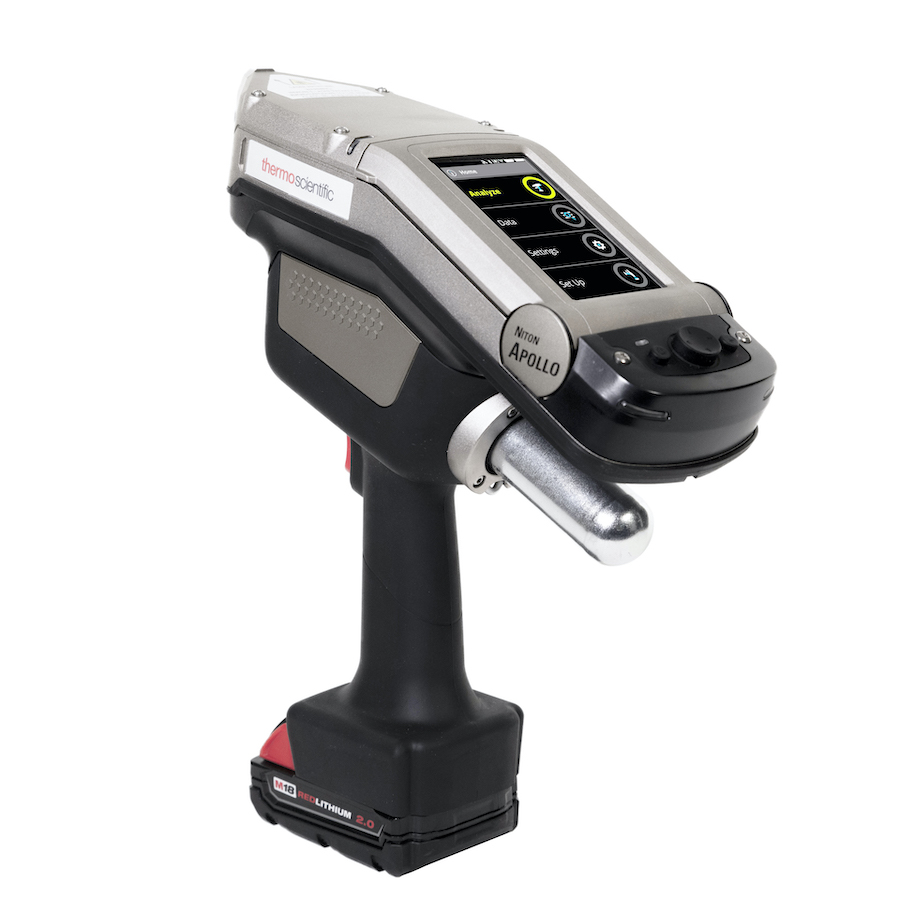
Niton Apollo
Niton Apollo LIBS Analyser

The Niton Apollo LIBS Analyser is the leading LIBS handheld device. Take full advantage of the revolutionary impact that LIBS is having on the manufacturing industry. Bring the power of lab analysis to the field, and gain an edge over your competitors with the speed and accuracy of your inspections. 

If you are interested in learning more about the Niton Apollo, click here, or if you would like to discuss purchasing a device, don’t hesitate to contact us.

Laser-Induced Breakdown Spectroscopy is fast becoming the most viable and sought-after element analysis technology on the market. If you are a manufacturer, don’t miss out on the LIBS wave. It might be relatively new, but it’s redefining what’s possible in the industry. 

The Five Most Common Methods of Carbon Analysis in Steel

The Five Most Common Methods Of Carbon Analysis In Steel

The strength and durability of steel is largely determined by its carbon content. Therefore, it is essential that manufacturers can measure carbon accurately and quickly. Here are the five most commonly used methods for carbon analysis in steel. 

Why Measure Carbon Content?

Different alloys require different carbon content percentages. Some stainless steels require as little as 0.0.3% carbon to be present. To ensure that their materials are compliant with specifications, manufacturers must be able to determine the carbon content to incredibly small degrees of magnitude. 

The reason the amount of carbon is important is because of how it affects the steel. For example, a higher carbon content makes steel harder. The problem is, if it isn’t treated properly, being harder actually means it is less malleable and more likely to break if used incorrectly. The other trade-off is that more carbon decreases the melting point of steel.

The results of incorrectly classified steel can be severe. Steel that breaks or melts will damage the system it is being used in, not to mention incurring replacement costs and a loss of production. If the steel is used in conjunction with human labour, it could also cause injury.

Accurately measuring carbon in steel is vital for any manufacturer who wants to be credible and profitable. 

How To Measure Carbon In Steel

There are many methods for carbon analysis in steel, ranging in efficiency and precision. 

Infrared Absorption

Infrared absorption is when the material being analysed is burned in oxygen.  This method is accurate, but very time consuming.

Visual Spark Analysis

Visual spark analysis involves grinding steel at high speed to produce sparks, spark analysis is thought of as a more antiquated technique. 

OES Sorting

Optical Emission Spectroscopy (OES) sorting occurs when a sample of the steel is vaporised with electricity or a spark.  Unfortunately, while this method is accurate, it is cumbersome to use. The analysis process takes approximately 30 seconds to complete, and it is also susceptible to skewed results from surface contaminants. 

XRF Analysis

X-ray Fluorescence Spectroscopy (XRF) is a non-invasive method for measuring carbon in steel. The main issue with XRF technology when applied to carbon, is the heavy matrix of steel can affect the absorption of radiation created by the X-ray. This means XRF is very useful for classifying what alloy a steel is suited for, in conjunction with LIBS technology.

LIBS Technology

While all of the listed technologies are still widely used, there is a newer technology that is revolutionising how carbon is analysed. Laser-Induced Breakdown Spectroscopy (LIBS) is a highly regarded method that has been used in labs, but is available for the first time in a hand-held, field-ready device. 

LIBS technology uses a laser to create a plasma on the surface of the material. This plasma, composed of electronically excited atoms and ions, only exists temporarily. It will rapidly start to revert to its previous form and as it does, wavelengths unique to carbon will be emitted. These wavelengths can then be measured to identify the exact amount of carbon present in the material.

LIBS is highly accurate, quick and efficient to use, and doesn’t damage the steel it is testing. 

Read more about LIBS technology.

Niton Apollo LIBS Analyser

Niton Apollo
Niton Apollo LIBS Analyser

The Niton Apollo LIBS Analyser is the leading hand-held device for carbon analysis in steel. With its simple to use design and ‘point and shoot’ function, there isn’t a more user-friendly method on the market. 

Bring the power of lab analysis to the field with the Niton Apollo’s unmatched speed, superior performance and enhanced productivity. Suitable for examining raw and manufactured materials, scrap and existing assets, there is no steel analysis scenario where you won’t benefit from using the Niton Apollo.

To remain profitable and reputable, it is essential that you correctly measure the carbon composition of your steel materials. Finding a technology that is accurate and efficient is important. If the Niton Apollo sounds like the perfect combination of precision and speed, don’t hesitate to contact us

It’s Time For Your Seeds To Be More Photo-Genetic: How Advanced Image Processing Assists Seed Germination Testing

By understanding how to prevent seeds from failing to germinate, and by making the germination process more efficient, the seed industry can have higher and more frequent yields. Learn how advanced image processing is improving the effectiveness of seed germination testing.

What is Seed Germination Testing?

Seed germination refers to the process of a seed becoming hydrated, through to it sprouting. Different seeds sprout under different conditions and over different periods of time. They need varying amounts of water, light and heat, and some even need the seed coating to be damaged in some way before germinating. 

Germination testing is when these complex conditions are categorised through germination experiments in a controlled environment.  

Why is Seed Germination Testing Important?

Seed testing is important because for crops to be viable, the exact conditions for, and duration of, the germination period need to be categorised. If seed use-by-dates are incorrect, or the conditions for germination aren’t accurate, crops can fail to yield. This not only costs the grower the income from the yield, but it also costs them the labour of planting, and the cost of the seeds themselves. 

Seed testing is also important for uncovering insights into how to expedite the germination process. If testing can shorten the germination period, more crops can be harvested more frequently, leading to greater profit margins.

What is Advanced Image Processing?

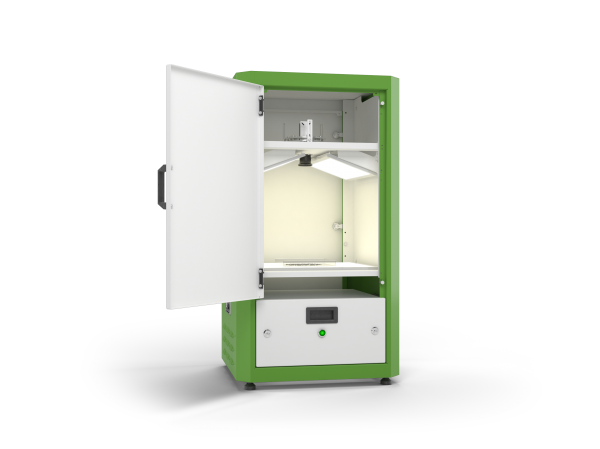
One way seed testing has been improved is through the addition of advanced image processing. Advanced image processing devices are – in layman’s terms – fridge sized chambers in which seeds can be germinated under a variety of simulated conditions. As the germination process occurs, high clarity images are taken that record information. This information includes:

  • The number and dimensions of seeds and seedlings
  • Whether seedling germination is normal
  • Whether foreign seeds are present
  • If any seeds are damaged or poor quality
  • The precise times that milestones in the germination process occur

All of this data is essential to understanding the necessary conditions for seeds to germinate.

By recording the seed germination process with greater clarity and detail, seed testers using advanced image processing are able to focus more on development and less on data recording. It also makes it easier for testers to refer to previous results for comparison. 

How does Advanced Image Processing Work?

The usual process for testing a seed batch is time consuming and susceptible to human error. At each stage of germination, testers must manually inspect and count every seed or seedling. They do this by scoring them, usually with a number system. 

Aside from the time taken to complete the task, the scoring relies on the tester to determine the quality of the sample. While testers are highly trained and work within guidelines, this process is inherently qualitative, because no two individuals will agree completely, 100% of the time. 

Advanced image processing photographs the samples and automatically counts and grades them in seconds. The algorithm that does this can be adjusted and refined over time. Essentially, the more results it gets, the more accurate it becomes. This process is exponential. 

Another advantage of advanced image processing is the longevity of physical evidence. Seed samples must eventually be discarded. Seed testers may discover later that there was an unforeseen issue with the sample, but once it’s gone, or has germinated further, they cannot confirm their suspicions. 

With the digitally stored images taken by an advanced image processing device, testers can refer back to previous samples indefinitely. Having access to a body of work, rather than a single sample set, allows them to work with more information and objectivity.

Lemnatec SeedAIxpert Pro

The Lemnatec SeedAIxpert Pro is the fastest digital seed testing system in the market. Its combination of high-resolution imaging and artificial intelligence (AI) algorithms ensure that data is taken quickly, accurately and effectively. 

The SeedAIxpert Pro is designed to save testers time on labour, and improve their ability to make breakthroughs. Just a few of its features include:

  • Easy to reproduce and standardise results
  • Images are easy to create, store and label
  • Images are taken with a high-resolution, industrial grade camera
  • Label images can be annotated with key data, and are stores in a system that enables easy retrieval
  • Data can be easily exported to external devices for long-term storage
  • The device is applicable for testing seed production, breeding, genealogy and quality control
  • The device can test wild, agricultural, commercial and ornamental plants

With all of these features, it isn’t hard to see why the Lemnatec SeedAIxpert Pro is the leading machine for advanced image processing in the seed germination field. If you would like to learn more about it, click here. 

To enquire about purchasing a SeedAIxpert Pro, don’t hesitate to contact us.

Seed germination testing can be a laborious process, especially if samples fail and need to be re-tested. By embracing advanced image processing, seed testers can make the process more efficient, and more successful. Don’t continue to lose valuable time to data entry that could be spent on experimentation and development – consider advanced image processing. 

Not Out of the Woods yet: A Reflection on Last Year’s Timber Shortage and the Importance of Quality Screening

Not Out Of The Woods Yet: A Reflection On Last Year’s Timber Shortage And The Importance Of Quality Screening

You may remember that for much of last year, Australia was experiencing a serious timber shortage.

Wood prices skyrocketed because there wasn’t enough of it – leading some to call for the Federal Government to extend their home-building assistance program.

In some cases, supply chain delays for some products were as long as 26 weeks due to the shortage of timber.

Due to the global timber shortage, there were major delays and soaring costs in the building supply chain.

While the crisis has subsided for now, there are some vital lessons to be learnt if you want to have the best chance of remaining profitable if a similar crisis happens again.

What Caused The Timber Shortage?

Several mill closures, shrinking pine plantations and devastating bushfires all contributed to the timber shortage in Australia.

The Morrison government’s Homebuilder program was also more successful than expected – with the resulting rise in demand for timber further straining supply lines.

Due to many countries using construction as an economic stimulus, materials were in high demand globally. 

A strong US housing market, for example, placed pressure on the global supply chain, with the shortage lasting several months.

At the start of 2021, one-fifth of construction timber was imported to Australia. But spot timber prices increased 400% in the US. As a result, international traders sent their entire supplies to the US.

The Suez Canal blockage has also caused shipping costs to rise and created major delays.

In response, domestic timber production increased by 17%, but it still wasn’t enough to meet demand.

What Did The Timber Shortage Mean For Quality Control?

Framing pine was severely lacking across the country – in particular longer lengths, which became very scarce. 

Due to the scarcity of this product, suppliers generally charged resellers more per linear metre for longer lengths. 

Certain types of pine also became limited, such as Radiata Pine frames, and suppliers offered Baltic Pine alternatives.

The Australian Timber Importers Federation convened with a number of northern hemisphere suppliers, in particular from Sweden, Lithuania, Russia and Canada.

Phillip Screpis, owner of Blacktown Building Supplies, turned to sourcing timber from Russia to meet the demand.

“I am saying more no’s than yes’ because of supply. It’s pointless for me to say yes I can do this but I can’t supply you for another three or four months,” Mr Screpis told 9News.

“At the moment when push comes to shove… what do you do?”

With so much timber coming into Australia from Russia, China and other countries, it was vital to be able to determine both the proper value and quality of the material.

Importers like Mr Screpis were able to secure these alternate channels, but determining if the timber they were being supplied with was good quality or not required an edge – and that edge was fast and accurate hyperspectral imaging technology.

The Best Screening Tool For Timber Quality

In wood sciences, hyperspectral imaging is used to assess wood characteristics, chemical composition, mechanical properties, wood modifications, moisture content, and decay.

Nano hyperspec
Headwall Photonics – Spectral Imaging

Wood hardness, shrinkage, and anisotropy are strongly correlated with wood density and microfibril angle. This makes it imperative to understand how these values vary spatially. 

Hyperspec Nano

Headwall’s Nano-Hyperspec® is a completely integrated hyperspectral sensor designed for the VNIR (400-1000nm) spectral range.

A completely integrated lightweight (<0.52kg) VNIR hyperspectral sensor includes on-board data-processing/storage and GPS/IMU. 

A key advantage of Nano-Hyperspec is that it also includes 480GB of on-board data collection/storage, plus attached GPS/IMU functionality. When attached to a payload bay, a UAV can be optimised for other needs such as video or thermal imaging.

How To Apply The HyperSpec Nano

What becomes visible to a hyperspectral sensor between 400 and 1000nm can include the presence of disease conditions on a tree canopy where it otherwise might be invisible from below. This is especially important as Australia ramps up its forestry and timber production.

Not Out of the Woods yet: A Reflection on Last Year's Timber Shortage and the Importance of Quality Screening 5
Measuring the heights of trees before (top) and after (bottom) Hurricane Maria. These two slices come from Humacao in eastern Puerto Rico, just north of where the hurricane made landfall. Credit: Vivian Griffey / Headwall

Natural wood is composed of cellulose, hemicellulose, lignin, sap, extractives, and organic compounds. In living trees, axial tracheids are the main components that conduct water and provide support. 

Softwoods form early-wood in the spring, consisting of wide and thin-walled tracheids, and thicker late-wood tracheids with smaller cell diameters later in the year. 

There are small chemical differences between early and late-wood. For example, early-wood is known to contain higher levels of lignin than later-wood.

Using complex hyperspectral imaging, the real quality of timber can be better determined. This matters when the material is being used to support frames in homes, for example.

Most wood and timber products are tested in tension, compression, and flexure to determine their ultimate or breaking strength. 

Construction, furniture, and consumer goods are the most common industries that use wood products that undergo mechanical testing.

However, having a hyperspectral imaging tool is faster and more convenient, while offering accurate results on the chemical makeup and inherent quality of the timber in question.

So what’s the main Lesson in hindsight?

Scarcity causes desperation – and desperation led to the Australian market being flooded with cheap material. While this was a necessary measure, for importers without the appropriate hyperspectral imaging tools, quality control became a huge issue.

If Australia faces another timber shortage you want to be well prepared, because just like in last year, you never know when a crisis could emerge again.

Related Link

Science Goes Bush: An Overview Of Hyperspectral Remote Sensing

Speak to PAS today for expert guidance on hyperspectral imaging options from Headwall Photonics.

Dangers Of Asbestos – Everything You Need To Know

Dangers Of Asbestos – Everything You Need To Know

Asbestos is a mineral formed by a natural process, and is made up of tiny, microscopic fibres. These flexible fibres are resistant to electricity, heat and corrosion, making them a useful mineral used in construction. 

However, inhalation of asbestos fibres can be harmful. Workers in the construction, waste management, and environmental protection agencies are more susceptible to health risks from long-term inhalation of asbestos fibres. 

In this article, we will look at the dangers of asbestos and how you can safely protect yourself when working with it. 

What Are the Dangers of Asbestos? 

Inhalation of asbestos fibres can increase the risk of diseases such as: 

  • Asbestosis: a lung disease caused by inhalation of asbestos fibres
  • Pleural effusion: excess fluid between the layers of tissue outside the lung, otherwise known as ‘water in the lungs’
  • Pleural plaques: thickening of the lining of the lungs
  • Pleurisy: inflammation of the tissue between the lungs and the chest 
  • Mesothelioma: a rare cancer

Mesothelioma is a rare cancer that occurs inside the tissues that line the body’s internal organs, such as the lungs, heart, and stomach. According to the Australian Institute of Health and Welfare, around 800 people are diagnosed with mesothelioma in Australia each year, making the country one of the highest reported incident cases in the world. 

Although asbestos can be dangerous to your health, understanding asbestos and having a safe plan to manage it can decrease risk significantly.

Why Is Asbestos Dangerous?

Asbestos can be dangerous because of its small fibrous particles which the naked eye cannot see. Inhalation is the primary way asbestos enters the body, and research has shown that smoking can exacerbate asbestos-related diseases by up to 80 times more. 

However, avoidance of asbestos is not always feasible. Many people are exposed to asbestos daily, which may not lead to asbestos-related diseases. This is because small particles of asbestos around us pose little threat.

One of the biggest myths of asbestos particles is that being near them can cause health problems. If left undisturbed, undamaged, and sealed, asbestos can be harmless. It’s only when the asbestos deteriorates or is disturbed that it releases fibre particles that are inhaled.

Hence, you should not panic if your workplace or home has asbestos. Instead, you should determine how much asbestos you are being exposed to and if it is at a dangerous level. 

How Much Asbestos Exposure Is Dangerous? 

Both short-term and long-term exposure to asbestos can cause mesothelioma, but its degree of severity varies based on a few factors. 

Short-Term Exposure

Short-term exposure is exposure to asbestos that’s only for a few days. For example, doing a one-off renovation or moving asbestos for a few days is unlikely to result in any health risk. However, while light, short-term exposure might not cause disease, you should know that asbestos exposure can accumulate for many years. 

Besides that, an extreme burst of short-term asbestos exposure can also cause risks. For example, if you’re exposed to toxic fumes from a damaged building caused by fire or floods, you might have an increased risk of asbestos-related disease. 

Long-Term Exposure

Long-term exposure is considered a heavy and prolonged exposure to asbestos, and it is a likelier cause of asbestos-related health issues. Studies show that up to 10% of people with long-term asbestos exposure, either at work or at home, will develop mesothelioma. Hence, individuals whose work involves repairs, renovations, and maintenance have a higher risk of exposure and may not show symptoms until 20 to 30 years later. 

Family members of workers who work with asbestos may also be at risk, as the asbestos can stick to the worker’s clothes as they return home. This condition is otherwise known as secondhand asbestos exposure.

Most Dangerous Types of Asbestos 

All types of asbestos are dangerous when inhaled, but some asbestos can be more toxic than others. Here are the common types of asbestos: 

Crocidolite

Also known as blue asbestos, crocidolite asbestos is mainly used for commercial products because of its heat resistance. Crocidolite is known as one of the most dangerous types of asbestos. 

Chrystollite

Otherwise known as white asbestos, this type is most frequently used in walls, ceilings, and roofs.

Amosite

This brown-coloured asbestos is commonly used in pipe and thermal insulations. They are also found in cement sheets and ceilings.  

Anthophyllite 

This asbestos can range from brown to yellow and is mainly used in cement and insulation materials.

Tremolite and Actinolite

Generally found in grey, brown, or green in colour, tremolite and actinolite is mainly used in sealants, paint, and insulation.

How to Deal With Asbestos Safely 

Handling any type of asbestos can be potentially dangerous, so here are some tips on doing it safely. 

Tip 1: Identify asbestos using the microPHAZIR™ AS Asbestos Analyzer

Before you begin work, you must verify that the substance you’re working with is asbestos. This will ensure that you take the necessary precautions to protect yourself and those around you. View our asbestos detection page here to learn more.

While asbestos fibres cannot be seen with the naked eye, there’s no need to perform time-consuming lab analysis before your work. Instead, you can now use tools such as the microPHAZIR AS™ Asbestos Analyzer to screen and analyse all six types of asbestos in seconds. 

Tip 2: Wear suitable Personal Protective Equipment (PPE)

Once you have identified that the substance you’re working with is asbestos, you should proceed with caution and use the appropriate PPE. In most cases, you should be wearing coveralls, respirators, and gloves in most cases. Your PPE should also be disposable, and if possible, avoid wearing wool or any other material that can attract fibres or dust. 

Tip 3: Ensure you work in proper surroundings

Assess the situation on where you work. If you’re working indoors, ensure that the area is as ventilated as possible. You can also cover the floors and furniture with plastic sheets to stop any dust or harmful fibres from sticking to it. If you’re working outdoors, close all windows and doors to prevent the fibres from reaching in, and do not work with asbestos on a windy day. 

Tip 4: Clean-up after handling asbestos 

You should clean the area by vacuuming or dry sweeping the area. Keep dust and debris damp with water, double bag any waste you have, and decontaminate all materials used during the work. Once you’ve cleaned the area, carefully remove your disposable PPE and dispose of it by double bagging the item. 

Working with asbestos may pose a health risk, but with the right tools to identify it, you’ll be able to work around it safely. If you’re in the construction, environmental protection, or waste management industry, contact us to find out how you can instantly test and determine asbestos in materials with the microPHAZIR AS™ Asbestos Analyzer.

Source Links:

  • https://www.health.nsw.gov.au/environment/factsheets/Pages/asbestos-and-health-risks.aspx
  • https://www.asbestossafety.gov.au/asbestos-health-risks-and-exposure/asbestos-health-risks
  • https://www1.health.gov.au/internet/publications/publishing.nsf/Content/asbestos-toc~asbestos-when-and-where
  • https://www.mesothelioma.com/mesothelioma/causes/smoking/
  • https://www.asbestos.com/mesothelioma/
  • https://www.asbestos123.com/news/what-is-the-most-dangerous-type-of-asbestos/
  • https://www.asbestos.vic.gov.au/in-the-home/find-manage-remove-dispose/managing-asbestos/dos-and-donts-for-working-with-asbestos
  • https://www.mesothelioma.com/asbestos-exposure/handling/